- This page covers facts and in-depth game usage of the character, Gelda Nebilim. For a comprehensive reference list of in-game commands, see Command List: Gelda Nebilim.

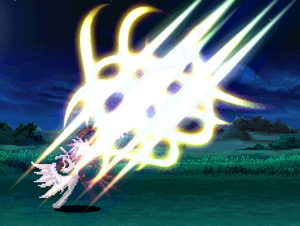
Nebilim using Shouha Rekkousen.
Nebilim is the replica of Professor Gelda Nebilim (ゲルダ・ネビリム Geruda Nebirimu) from Tales of the Abyss. She is the result of Jade Curtiss and Saphir's act in trying to revive their former teacher by using Fomicry (creation of replicas using Fonons). The original Gelda Nebilim was killed in an accident caused by Jade's failed attempt in using the Seventh Fonon. The Nebilim replica's personality is evil and only concerned with herself, shown when she absorbs fonons from other living things for sustenance. The Nebilim replica wields Luke fon Fabre's Nebilim catalyst sword in one hand and Jade Curtiss' Blood Pain catalyst spear in the other as her main weapons.
She possesses a few physical attacks and many strong spells which she can further augment with different elements by using FOF Changes. Similar to other boss characters in ACS, her stats range from above average to excellent with not being able to jump as her only weakness. Nebilim is easy to use and is very powerful. She is an excellent character for beginners to practice.
Character Facts[]
- Nebilim has 710 HP.

Nebilim's victory pose.
- Special dialogue scenes will occur whenever she faces any of the Tales of the Abyss protagonists.
- Nebilim only has one victory pose.
- Nebilim is the strongest boss in Tales of the Abyss.
General Tips & Usage[]
- All of Nebilim's stats except for air dash length and jump height are above average.
- Nebilim takes 50% less damage on all attacks when she has very low HP.
- Nebilim's movement skills differ from other ACS characters:
- She cannot perform any kind of jump and air dash. But she can still jump when using Star Stroke (Aerial) and Stroke Quaker.
- She can run backwards when ←← is pressed. This replaces the back step movement skill.
- While running or walking, she can pass through enemies.
- Nebilim only has two basic ground melee attacks (A & B), but they both posses decent range and speed. She does not posses any basic melee aerial attacks.
- She can augment her spells (except for Prism Sword, Meteor Storm and Absolute) with FOFs by holding ↑ during spell casting. This cannot be done during Overlimit status since all of her spells with FOF Changes will have instant casting time.
- During Overlimit Lv1, The spells Ground Dasher, Saint Bubble, Ignite Prison and Thunder Blade will have instant casting time and the rest of her spells will have reduced casting time.
- Nebilim also becomes harder to stagger (hidden Penetrate status) when she is casting her spells during Overlimit Lv1.
- During Overlimit Lv2, All of her spells have instant casting time and have no TP costs.
- Her chain order consist of:
- Melee > Base > Arcane > Mystic
- Spells can be used after Melee and Base but will still require casting time unless Nebilim is in Overlimit.
Shortcuts[]
Command Ground F Overlimit Lv1 ← F Shishisenkou → F Senkou Tsuijinga ↑ F Fuujin Kousenshou ↓ F Overlimit Lv2
Base Artes[]
- Senkou Tsuijinga (Light Spear Cannon)
ACS Gelda Nebilim Arte Exhibition (v.5.505b) COMPLETE
Gelda Nebilim's Arte Exhibition by Kratos1991.
- Banishing Sorrow
- Fuujin Kousenshou (Sovereign Gale)
- Nebilim thrusts both her weapons into the ground, causing a gust of wind to knock the enemy upwards.
- Can be used to stop an opponent's aerial charge.
- While using this arte, Nebilim is harder to stagger and cannot be interrupted with only one hit (hidden Penetrate status). She can still be interrupted when multiple hits are connected.
- This arte can be linked to Nebilim's melee attack and to almost all of her artes to restart her chain order.
- Wind Elemental.
- TTS is Slow. TTL is Long.
- Rentou Raikoudan (Surge Breaker)
- Shishisenkou (Beast)
- Star Stroke
- Star Stroke

Arcane Artes[]
- Shouha Rekkousen (Light Blast)
- Nebilim sweeps the enemy into the air with her blade of light, then thrusts diagonally into the air, impaling the target with multiple light waves.
- The first hit has more range than Senkou Tsuijinga, making it possible attack more that 1 enemy.
- This arte can still hit enemies on the ground even if the first hit misses.
- Long delay after use.
- Light Elemental.
- TTS is Fast. TTL is Average.
- Searing Sorrow
- Nebilim summon a giant fire ball to attack the enemy. A pillar of flame will appear the from where the fire ball lands.
- Range is about 40% of the screen's length.
- Ideally used to corner the opponent against a wall.
- The pillar of flame can hit opponents in mid-air.
- Fire Elemental.
- TTS is Slow. TTL is Average.
- Suijin Karyuusou (Mighty Deluge)
- Nebilim stabs her sword on the ground, summoning an aqua tornado around herself to knockback nearby enemies.
- While using this arte, Nebilim is harder to stagger and cannot be interrupted with only one hit (hidden Penetrate status). She can still be interrupted when multiple hits are connected.
- Follow up with a Searing Sorrow to deal heavy damage. This is not a valid combo though.
- Water Elemental.
- TTS is Slow. TTL is Average.
- Shikou Bakuraijin (Thunder Beast)
- Stroke Quaker (Quake Stroke)
- Nebilim Laser
- Gungnir
- Nebilim slams the ground, gathers power and fires a beam of light.
- The beam of light travels 100% of the screen's length.
- Every hit but the first is unblockable.
- This arte is basically a copy of Anise Tatlin's Guru Guru Gungnir.
- This arte cannot be used as part of a combo.
- Wind Elemental.
- TTS is Instant. TTL is Average.
Spells[]
- Ignite Prison (Infernal Prison)
- A glyph appears and fiery jets blare up all around, scorching those within.
- Most easy spell to cast and can be spammed many times in Overlimit but the enemy can still air-tech.
- This is the only spell that can be chained from Senkou Tsuijinga without restarting the combo counter.
- Fire Elemental.
- TTS is Slow normally, but Fast during Overlimit. TTL is Short.
- Thunder Blade
- Ground Dasher
- Saint Bubble (Blessed Drops)
- An innocent-looking bubble appears, slowly drifting to the ground. When it hits, a swarm of painful bubbles pop and crack, destroying all within.
- The first hit of the spell is unblockable.
- A bit hard to hit a human opponent or an AI with a high difficulty setting.
- After the spell finishes, there's a small time for linking this arte to the melee attack A and is only possible in the corner.
- Water Elemental.
- TTS is Slow normally, but Average during Overlimit. TTL is Short.
- Absolute
- The target entrapped in a glacier of ice, then shattered to pieces.
- Very hard to evade after it has been casted.
- Costs TP unless Nebilim is in Overlimit Lv2.
- Water Elemental.
- TTS is Slow normally, but Average during Overlimit. TTL is Short.
- Prism Sword
- Sharp crystal shards surround the enemy and is attacked with rebounding laser beams. A giant sword-shaped crystal shard then smashes down on the enemy.
- Has the longest TTL from all of Nebilim's spells.
- You can chain this arte to itself during Overlimit.
- Costs TP unless Nebilim is in Overlimit Lv2.
- Light Elemental.
- TTS is Slow normally, but Average during Overlimit. TTL is Long.
- Meteor Storm
- The countless meteors rain from the sky, annihilating enemies across the battlefield.
- Needs Overlimit.
- Nebilim casts this arte faster than most ACS characters having the same spell.
- Don't use this arte if you or the enemy are near walls as less meteors will fall to the ground.
- Costs TP unless Nebilim is in Overlimit Lv2.
- TTS is Slow normally, but Average during Overlimit Lv2. TTL is Short.
- Raging Mist
- Both a cloud of ice and a scorching pool of fire appear. They mix and create hot-spring mayhem.
- The pouring water gives the chance to link this arte to melee combos.
- This arte, when blocked, is useful for covering Nebilim's cross-up techniques with her dash and covering an unblockable Banishing Sorrow.
- TTS is Slow normally, but Average during Overlimit. TTL is Long.
- Gravity (Gravity Well)
- Frigid Coffin
- Divine Saber
Mystic Artes[]
- Big Bang
- Freezes enemies in place as the background changes to that of a galaxy. I powerful wide screen explosion occurs afterwards.
- This arte is unblockable.
- If you manage to evade the first hit, using Overlimit's short invulnerability frame with proper timing allows you to evade this attack.
- The power of this arte decreases in proportion to the increase in the combo count.
- TTS is Very Fast. TTL is Non-existent.
- Fortune's Arc
- End of Fragment (Fragmented End)
- A fonic glyph appears on the ground, from which six red and blue spherical objects rise. From there, they settle around Nebilim, who then rises up, taking the spheres with her. The spheres turn vertically and connect with each other to form a circle, before Nebilim fires a series of energy blasts from the balls. Following this, a larger glyph appears in the center of the circle, from which a large, multi-hitting energy laser fires, accompanied by smaller lasers from the six spheres.
- This arte can stun enemies at close range, allowing a clean hit.
- This arte's damage decreases at a great rate as the number of hits in the combo increases.
- Can cause Guard Break faster than most of her artes.
- This isn't recomended for a long range attack, because it can be blocked.
- TTS is Fast. TTL is Non-existent.
Advanced Tips & Combos[]
Battle Strategy[]
General Use Combos[]
Gravity Combo[]
- Gravity > Move quickly towards the enemy [Note 1] > Fuujin Kousenshou > Walk closer to the enemy > Melee Attack X2 > Senkou Tsuijinga > Shouha Rekkousen [Note 2]
- Quick Input Version:
- →←→C + Hold ↑ > →→ or → > ↑F > → > A > A > ↓A > ↓↓D
- Total Hits = 38. Damage is about 1/5 of Kakashi Scarecrow's 500 HP.
- Requirements and Notes:
- TP for Gravity.
- Note 1: Depending on your distance from the enemy, it is much easier to connect Fuujin Kousenshou if your close to the enemy. This is the trickiest part of this combo as it is very difficult to control Nebilim when she starts to run. Use the shortcut button for Fuujin Kousenshou for faster execution.
- Note 2: Wait for the enemy to land on the ground before using Shouha Rekkousen. You can also use Big Bang after this arte but it is not recommended since the damage of Big Bang decreases as the combo counter increases
- Requirements and Notes:
Inferno Combo EX (AKA Makaleico Combo)[]
- Prism Sword > Searing Sorrow [Note 1]> Ignite Prison [Note 2] > Move towards the enemy [Note 3]> Melee Attack X2 > Senkou Tsuijinga > Shouha Rekkousen > Fortune's Arc [Note 4]
- Quick Input Version
- ↓←→D > ↓→B > ↓↓C > → > A > A > ↓A > ↓↓D > ↓↓E
- Total Hits = 55 Makes 255 Damage that is more that 50% Kakashi Scarecrow's HP
- Requirements and Notes:
- Overlimit to instant cast Ignite Prison.
- Note 1: Use it as close as possible in order to melee him later.
- Note 2: Spam the command if you want, you need perfect timing to link it.
- Note 3: Just walk normally. Try not to dash.
- Note 4: Use End of Fragment if you want but it is really hard.
- Requirements and Notes:
Highest Combo[]
- Overlimit Lv1 > Prism Sword X5 [Note 1] > Walk closer to the enemy > Fuujin Kousenshou > Melee Attack X2 > Senkou Tsuijinga > Shouha Rekkousen > Overlimit Lv1 > Melee Attack X2 > Senkou Tsuijinga > Shouha Rekkousen [Note 2] > End of Fragment
- Quick Input Version:
- F > ↓←→D > ↓←→D > ↓←→D > ↓←→D > ↓←→D > → > ↓←A > A > A > ↓A > ↓↓D > F > A > A > ↓A > ↓↓D > ↓←↓→E
- 142 Hits. Damage is 65% of Kakashi Scarecrow's HP (500).
- Requirements:
Tales of ACS v5.503 Gelda Nebilim Combo 142 Hits
Nebilim's 142 hit combo.
- 85% TP.
- Enemy is against a wall.
- Nebilim is near the enemy.
- Overlimit Gauge set at 2.
- Notes:
- Note 1: Use the 1st Prism Sword upon hearing the thump sound of the landing enemy or as soon as possible. Use the 2nd up to the 5th Prism Sword on the 9th hit of the previous one. Inputing the command too early or too late will not chain the Prism Swords together.
- Note 2: Wait for the enemy to land on the ground before using Shouha Rekkousen so that the enemy cannot air-tech.
- Requirements:
- Nebilim's Highest hit combo.
- Contributed by Minarie 15:59, June 29, 2011 (UTC)

Story Mode[]
Nebilim has a total of 3 Story Modes, ranging from Easy to Hard. Note that all modes including and preceding Hard feature opponents that come in "Rounds", meaning that the field, positions, and statistics (HP and otherwise) will reset once an opponent is defeated. Modes after Hard feature opponents that come one after another, meaning that the fields, positions, and statistics of your character will not reset once an opponent has been defeated. However, Some HP is refunded whenever an opponent is defeated in Mania mode.
Easy[]
Stan Aileron
Nanaly Fletch
Zelos Wilder
Dhaos
Normal[]
Fog, Chat, & Race
Lloyd Irving
Jade Curtiss
Synch (2 rounds)
Hard[]
Fog, Chat, & Race
Zelos Wilder
Luke fone Fabre
Luke fone Fabre and Guy Cecil
Cut-Ins[]
In ACS, Gelda Nebilim has three cut-ins.
- Tales of the Abyss
- Tales of the Abyss
- Tales of the Abyss
")
")
")