- This page covers facts and in-depth game usage of the character, Stan Aileron. For a comprehensive reference list of in-game commands, see Command List: Stan Aileron.
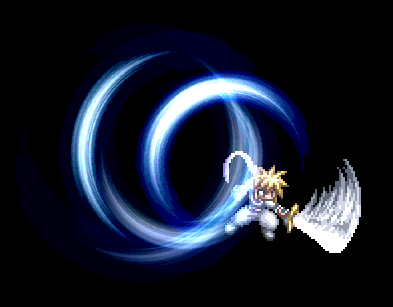

Stan using Rekkuuzan.
Stan Aileron (スタン・エルロン Sutan Eruron) is the sleepy headed main character of Tales of Destiny. He secretly boarded the flying ship called “Draconis” to get a free ride out of his village and was caught sleeping in the ship’s storage room. But when monsters attack the ship, he was able to find the Swordian Dymlos in the same storage room and escape the ship with minor injuries. This fated encounter with Dymlos marks the start of Stan’s adventure with several other people with similar sentient swords on a journey to save to the world.
In ACS, Stan is a slow but powerful character. His battle style combines his already excellent physical strength with Dymlos' ability to control fire to produce devastating fire attacks that deal damage to a large part of the battlefield. He also compensates for his slow movement speed and long after-arte delays with high HP and above average stats.
Stan is very easy to use in general but requires a bit of technique when executing long combos.
Character Facts[]
- Stan has 560 HP.
- He starts the battle posing with Dymlos.


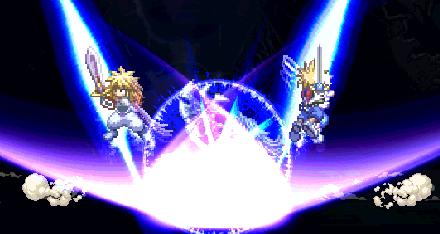
Stan and Kyle both using Zankuu Tenshouken on Barbatos.
- He has three different victory poses.
- Lyris Aileron and Kyle Dunamis are playable characters in ACS who are related to him by blood. (His little sister and only son respectively).
- Before the battle starts, a special scene and dialogue will occur if Stan is faced against either Lyris Aileron or Lion Magnus.
- When using Stan’s Zankuu Tenshouken against a low HP Barbatos Goetia, Kyle Dunamis will assist him and perform the same arte on the opposite side.
- Stan is one of the few ACS playable characters that can use Overlimit in mid-air.
General Tips & Usage[]
- Stan has high attack power, good jumping height, high HP, average dash length and decent defense against Guard Break but has slow movement speed and a long delay after most of his artes.
- Stan receives 60% more damage from Water-elemental attacks and 50% less damage from Wind-elemental attacks. (Please refer to this page for more information on ACS Elements).
- Stan can perform all the basic movements in ACS.
- His Double Jump is slightly higher than his High Jump, both of which reach the top of the screen.
- His Forward Air dash sends him straight foward then downward.
- His Forward Step has the same height as his High Jump. It has an average speed.
- His Backward Leap is the same as his Forward Step, only its jump height is a little lower.
- Stan can chain his backward air dash to his forward air dash
- Stan's High Jump, Forward Step, Backward Leap and air dashes costs 1 CC when used but can still be executed even if Stan has no CC points left.
- Stan has two melee ground attacks (A and B) and a basic riser attack (C then tap ↑). He also has two melee aerial attacks (A and C).
- His C aerial attack slightly tosses the enemy in mid-air and can be chained with his (A) aerial attack for a maximum of 6 hits. (Refer to Stan's Combos section for more details)
- Most of Stan’s aerial artes can be canceled by doing a forward air dash just before the arte has been fully executed. This move is known as Dash Cancel (DC).
- This action costs Stan 1 CC to execute.
- Stan can perform a Taunt by pressing ↓ E when he has very low TP.
- This action slightly increases his TP.
- Stan can use his Overlimit in mid-air during a combo.
- Stan uses a Chain Capacity (CC) Gauge, enabling him to create a stunning amount of combinations out of his many different artes as long as he has enough CC to use each arte.
- Stan's starting CC is set at 10. His CC Gauge replenishes back to 10 once a combo ends and he lands back down on the ground.
- For every hit that Stan connects to an enemy, there is a small chance his CC Gauge will temporarily increase by 1 or 2.
- This temporary increase can only reach a maximum of 15 points (Stan's CC Gauge Limit) and expires if not used for a short period of time or after a combo ends.
- During Overlimit Lv1, Stan’s starting CC is set at 13.
- During Overlimit Lv2, Stan's CC is frozen at 13.
- Using any of Stan's Blast Calibers will automatically end the chain.
- Stan's chain order consists of:
- Melee > Any Arte Type > Any Arte Type > Any Arte Type > etc.
- Some of Stan's Spells can be casted instantly if used within a combo.
- If Stan's Blast Caliburs are used, the combo ends.
Shortcuts[]
| Command | Ground | Air |
|---|---|---|
| F | Overlimit Lv1 | Overlimit Lv1/Shinkuuretsuzan |
| ← F | Shishisenkou | |
| → F | Souryuu Rengazan | Hienrenkyaku |
| ↑ F | Rekkuuzan | |
| ↓ F | Overlimit Lv2 | Overlimit Lv1/Shinkuuretsuzan |
Melee Artes[]
- Majinken (Demon Fang) or (Missle Sword)
ACS Stan Aileron Arte Exhibition (v.5.505b) COMPLETE
Stan Aileron's Arte Exhibition by Kratos1991.
- A projectile attack released on the ground which travels at 85% of the screen’s length.
- Useful for attacking distant enemies on the ground but can easily be blocked or jumped over.
- Has a short arte delay compared to the majority of Stan’s artes.
- Can only be used on the ground.
- During Overlimit Lv2, this arte is replaced by Souhajin.
- TTS is Fast. TTL is Short.
- Hienrenkyaku (Swallow Kick) or (Kick Attack)
- Rekkuuzan (Tempest Strike) or (Spin Slash)
- Stan launches himself in a forward arc, spinning his sword the entire time.
- Considered as one of Stan’s best artes, it's useful at shortening the distance between Stan and the enemy either before or during a combo.
- Can also be used in mid-air to escape ground based spells.
- Has a short arte delay compared to the majority of Stan’s artes.
- The last hit causes the Disabled status effect.
- TTS is Fast. TTL is Short.
- Kogahazan (Tiger Blade)
- Souryuu Rengazan (Dragon Swarm) or (Dragon Blade)
- A lunging attack consisting of four slashes.
- Best arte to use when it is necessary to shorten the distance between Stan and the enemy during a combo.
- Its animation is long enough for the player to decide his next move.
- Can only be used on the ground.
- Very safe on block.
- During Overlimit, this arte has an increased lunge range.
- TTS is Fast. TTL is Average.
- Shishisenkou (Beast) or (Force)
- A punch that releases blue chi in the shape of a lion's head.
- Good for finishing combos or creating distance between Stan and the enemy.
- This is Stan's strongest knockback arte.
- This arte can cause guard break faster than any of Stan’s regular artes.
- Causes the Disabled status effect.
- Can only combo to other artes if the enemy is against a wall.
- TTS is Fast. TTL is Very Short.
- Senkuuretsuha (Light Spear)
- Shinkuuretsuzan (Omega Tempest)
- Majin Souhazan (Demonic Tiger Blade)
- A projectile attack is released on the ground which travels at 85% of the screen’s length followed by an upward jump slash and a downward slash combo which causes a few rocks to randomly disperse towards the enemy.
- An alternate arte to use when it is necessary to shorten the distance between Stan and the enemy during a combo.
- Can only be used on the ground.
- TTS is Fast. TTL is Average.
- Majinken Shouga (Soaring Demon Fang)
- Goushourai (Coil)
- A small explosion ignites around Stan and damages nearby enemies.
- Slightly increases the attack power of Stan's Fire elemental strike artes for a period of time (indicated by a sword icon near Stan’s interface).
- TTS is Average.

Elemental Artes[]
- Souhajin (Azure Edge)
- A horizontal blast of wind ranging almost half of the screen's length.
- Allows Stan to float in mid-air for a short period of time. Using this arte repeatedly extends the float.
- Can only be used in mid-air but can be used on the ground during Overlimit Lv2. (Replaces Majinken).
- Wind Elemental.
- TTS is Fast. TTL is Very Short.
- Bakuenken (Hell Sword)
- A fiery downward sword slash.
- Hits harder and more times when used in mid-air.
- When the combo counter reaches a certain number of hits, using this arte in mid-air greatly tosses the enemy away, giving them room to air-tech.
- Has a short arte delay compared to the majority of Stan’s artes.
- Fire Elemental.
- TTS is Fast. TTL is Short.
- Toryuusen (Dragon Slayer)
- An upward thrust followed by a small upward burst of flame which slightly tosses an enemy up.
- Enemies can air-tech after this arte if not linked to other artes.
- Can only be used on the ground.
- Has a short arte delay compared to the majority of Stan’s artes.
- This arte is aligned with the Fire element.
- Fire Elemental.
- TTS is Fast. TTL is Average.
- Senkoureppa (Light Spear Blast)
- Multiple sword thrusts aiming the legs up to the head while the sword is covered with a green light.
- This arte slightly tosses the enemy in mid-air but disallows the enemy from air-teching.
- Causes the Disabled status effect.
- Can only be used on the ground.
- Light Elemental.
- TTS is Fast. TTL is Average.
- Shakkouken
- Gurenken (Hell Pyre) or (Throw Sword)
- Dankuuken (Severing Wind) or (Vortex)
- A horizontal spin slash which creates a small vortex whixh is followed by an upward jump slash which tosses the enemy in mid-air.
- A good anti-air attack but allows an enemy to air-tech once the combo stops.
- Can be used to further increase Stan’s jumping height.
- Wind Elemental.
- TTS is Fast. TTL is Average.
- Kuuga Shouryuukyaku (Dragon Toss)
- Hououtenku (Rising Phoenix) or (Spin Flare)
- A diving sword thrust while Stan is covered in a red phoenix-shaped aura.
- One of Stan’s best artes used for approaching enemies, intercepting them and evading attacks.
- Once Stan starts to dive, he will be invulnerable from most attacks until he lands.
- The aerial version of this attack has more invulnerable properties.
- This arte tosses the enemy in mid-air allowing them to air-tech.
- Fire Elemental.
- TTS is Average. TTL is Short.
- Maou Engekiha (Infernal Torrent) or (Fiery Wave)
- Neppa Senpuujin (Searing Gale) or (Flame Vortex)
- Stan creates a vortex of flame, performs an upward jump slash and thrusts his sword on the ground causing bursts of flame around him.
- Not a very powerful arte and is mainly used to evade attacks.
- When Stan is about to thrust his sword on the ground up to a few seconds after, he will be invulnerable to all attacks except for artes similar to Barbatos Goetia’s World Destroyer.
- Fire Elemental.
- TTS is Fast. TTL is Short.
- Shikou Bakuenjin (Fiery Beast) or (Hellfire)
- Shouourekka (Phoenix Blast)
- Stan surrounds himself in flame and thrusts his sword upward releasing a phoenix-shaped fire.
- Best anti-air arte for Stan but can only be used during Overlimit or when Stan has low HP.
- Can only be used on the ground.
- This arte hurls an enemy in mid-air.
- If used properly and within a very specific distance from the enemy, Stan's CC Gauge can recover during mid-combo. Usually for this to work, more than 4 hits must connect.
- Fire Elemental.
- TTS is Fast. TTL can be Short to Long depending on your distance when this arte was used.
- Resshintenshou (Rending Quake)
Spells[]
- Fireball
- A ball of flame travels straight for the full length of the screen.
- Pretty useless as Stan already has a projectile attack that requires no casting time.
- Can only be used on the ground.
- Requires casting time of less than 1 second.
- Once the combo counter reaches a certain number of hits, this arte requires no casting time when chained from Melee artes or Elemental artes.
- Fire Elemental.
- TTS is Slow if casted as a spell and Average if used with no casting time. TTL is Short.
- Eruption
- Fire Wall
- A wall of fire explodes around Stan.
- One of Stan’s better spells for finishing combos. Not recommended to use as a stand alone arte.
- Can only be used on the ground.
- Causes the Disabled status effect.
- Requires casting time of 0.5 seconds.
- Once the combo counter reaches a certain number of hits, this arte requires no casting time when chained from Melee artes or Elemental artes.
- Fire Elemental.
- TTS is Slow if casted as a spell and Average if used with no casting time. TTL is Short.
- Fire Storm
- A flaming tornado ravages under the enemy's feet and tosses them up in mid-air.
- The best spell that Stan can use and allows him to perform CC recovery by chaining this spell to a physical arte with a short arte delay (e.g. Majinken, Rekkuzan, Bakuenken).
- If executed properly, the combo counter will not reset. Press the command for the next arte simultaneously with Fire Storm's 1st hit.
- You can also use Cast Cancel to recover Stan's CC while this arte's animation is being executed.
- Can only be used on the ground.
- Requires casting time of less than 3 seconds.
- Causes the Disabled status effect.
- Fire Elemental.
- TTS is Slow. TTL is Long.
- Fearful Flare (Fear Flare)
- A sword swing hurls three burning meteors towards the enemy.
- A good spell but can only function as a stand-alone.
- The number of meteors unleashed greatly increases during Overlimit.
- Can only be used in mid-air.
- Does not require casting time.
- Causes the Disabled status effect.
- Fire Elemental.
- TTS is Average. TTL is Short.
- Explode
- A ball of fire slowly descends from the sky and causes a huge explosion upon reaching the ground.
- Stan’s strongest spell but can be easily avoided due to its long casting time.
- The best spell to use to finish a combo.
- This spell cannot be blocked in mid-air.
- Can only be used on the ground.
- The enemy can air-tech after being hit by this arte.
- Requires casting time of less than 4 seconds.
- Once the combo counter reaches a certain number of hits, this arte requires no casting time when chained from Melee artes or Elemental artes.
- Even though it looks like a Fire elemental attack, it is still considered as Non-Elemental.
- TTS is Slow regardless if casted or used instantly. TTL is Average.
Blast Calibers[]
- Kouou Tenshouyoku (Phoenix)
- Stan surrounds himself with intense fire, hurls the enemy up, covers himself in an phoenix-shaped aura of flame, then jumps and incinerates the enemy in mid-air.
- A great arte to chain to. TP and damage wise.
- Press down during the animation to display Stan’s Tales of Vs. cut-in during the upward thrust.
- Pressing F instead of E to execute this arte displays his original Tales of Destiny remake cut-in.
- Despite the obvious fire effects, ACS considers this attack as non-elemental.
- Can only be used on the ground.
- Enemies can air-tech after this arte has been executed.
- TTS is Very Fast. TTL is Short but if the enemy air-techs, TTL is Non-existent.
- Hiou Zetsuenshou (Burning Phoenix)
- Stan covers himself in a phoenix-shaped aura of flame then dives down to the ground and lunges through the enemy, leaving a trail of fire on the ground.
- Useful for finishing of enemies with low health.
- When Stan does his first strike, he'll actually switch sides with the enemy, so the enemy must block accordingly.
- Pressing F instead of E to execute this arte displays his original Tales of Destiny remake cut-in.
- Despite the obvious fire effects, ACS considers this attack as non-elemental.
- Can only be used in mid-air.
- Causes the Disabled status effect.
- TTS is Very Fast. TTL is Very Short.
- Satsugeki Bukouken (Final Fury) or (Assassin)
- Stan covers his whole body in fire then lunges towards the enemy and unleashes a flurry of punches, kicks and slashes before finishing with a fiery upward jump slash.
- Great for countering enemies after an attack has been blocked.
- Press down during the animation to display Stan’s Tales of Vs. cut-in during the final parts of the artes’ animation.
- Pressing F instead of E to execute this arte displays his original Tales of Destiny remake cut-in.
- Press backward before the final series of hits to increase the distance between Stan and the enemy.
- Despite the obvious fire effects, ACS considers this attack as non-elemental.
- Can only be used on the ground.
- Causes the Disabled status effect.
- TTS is Very Fast. TTL is Non-existent due to the long after use delay of this arte.
- Gouma Kaijinken
- Stan thrusts his sword upward and releases a pillar of flame from the tip of Dymlos, Then he lunges through the enemy twice before jumping high into the air and crashing down, creating a screen wide explosion.
- Stan’s second strongest arte and his highest hitting Blast Calibur.
- Despite the obvious fire effects, ACS considers this attack as non-elemental.
- Can only be used on the ground.
- Causes the Disabled status effect.
- TTS is Very Fast. TTL is Non-existent.
- Zankuu Tenshouken
- Stan covers his sword with blue light and performs a series of slashes, ending with a tremendous upward jump slash.
- Stan’s strongest arte that can only be used during OVL or when Stan has low HP.
- ACS considers this attack as non-elemental.
- Can only be used on the ground.
- Causes the Disabled status effect.
- When used against Barbatos Goetia, Kyle Dunamis will appear and assist him by performing the same arte in the opposite side. From this point on, the arte becomes unblockable (but the initial attack can still miss) and instantly kills Barbatos.
- Barbatos HP must be at around 50% for this to work.
- This arte will not work if Barbatos is against a wall.
- TTS is Very Fast. TTL is Non-existent.
Cameo Appearances[]
Stan also appears as a support character for Kyle Dunamis and assist him in using a Mystic Arte as enumerated below.
Blast Calibers (秘奥義 - Hi Ougi)[]
| Assistant | Name | Command | Elemental Damage | Hits | Power | Requirements and Notes |
|---|---|---|---|---|---|---|
| Stan Aileron | Zankuu Tenshouken 斬空天翔剣 |
E | - | 16 | 0 |
|
Advanced Tips & Combos[]
Battle Strategy[]
General Use Combos[]
9-Hit Melee Starter 1 (v5.503 and below only)[]
- Melee Attack X2 > Riser Attack > Aerial Attack A [Note 1] > Aerial Attack C [Note 2] > ( Forward Jump > Aerial Attack A > Aerial Attack C )X2 [Note 3] > [Note 4]
- Quick Input Version:
- A > B > C + ↑ > A > C > [ ↑ → > A > C] X2 > [Note 4]
- Total number of hits varies upon luck with Bonus CC Points but usually ranges about 23 to 40+ hits. Damage is very small but if you combine it with a basic artes combo its about 1/6 or 1/7 of Kakashi Scarecrow's HP (500).
- Notes:
- Note 1: Press A just as the enemy starts to fall but before he can air-tech. This is the hardest part of the combo.
- Note 2: Press C just as Stan’s feet is the same height as the enemy’s body or head.
- Note 3: While the enemy is still in mid-air, Press and hold ↑ → and as Stan jumps forward press A immediately but don’t let go of ↑ →. When A attack connects, the enemy will start to fall straight down which the C attack should be pressed. Both A and C must connect before Stan touches the ground and while still holding ↑ →. If successfully executed, the enemy will be slightly hurled in mid-air and Stan will jump forward again (because your holding ↑→). Rinse and repeat until the combo counter reaches 9 hits.
- Note 4: Unleash your basic favorite combo here but make sure your 1st arte lets you close in on the enemy (e.g. Souryuu Rengazan, Majin Souhazan, Rekkuzan). Luck is a big factor here as the number of hits will increase depending on the CC bonus points you receive as you attack. You can even finish this combo with a Blast Calibur or extend it further using Overlimit.
- This is Stan’s basic 9-hit normal attack combo combined with his artes. It is very difficult to use.
- This combo does not work on enemies with small hit boxes (in short, small characters like Presea Combatir).
- Update: This combo has been nerfed to a maximum of 6-7 hits only and is more difficult to do starting v5.505b and up.
- Contributed by Minarie 15:34, March 15, 2011 (UTC)
9-Hit Melee Starter 2 (v5.503 and below only)[]
- Jump [Note 1] > Aerial Attack C [Note 1] > ( Forward Jump > Aerial Attack A [Note 2] > Aerial Attack C [Note 2] ) X 4 > [Note 3]
- Quick Input Version:
- ↑ > C > ( ↑ → > A > C ) X4 > [Note 3]
- Damage and hit count will vary depending on the combo used at Note 3.
- Requirements:
- Enemy must be downed or disabled before starting the combo.
- Notes:
- Note 1: The enemy must be disabled before jumping. Try to time your jump just right and make sure that when the enemy gets up, you can hit them with Stan's Aerial Attack C.
- Note 2: The timing of Aerial Attack A is to press it just as Stan starts to jump and its not very difficult. On the other hand, the timing of Aerial Attack C is to press it as late as possible but not too late as Stan would already be standing on the floor by then.
- Note 3: Unleash your basic favorite combo here but make sure your 1st arte lets you close in on the enemy (e.g. Souryuu Rengazan, Majin Souhazan, Rekkuzan). Luck is a big factor here as the number of hits will increase depending on the CC bonus points you receive as you attack. You can even finish this combo with a Blast Calibur or extend it further using Overlimit.
- Requirements:
- Stan's bread and butter starter combo. You will find yourself using this combo a lot more than the others. Try to get the enemy downed or disabled first to set-up for this combo.
- Update: This combo has been nerfed to a maximum of 6-7 hits only and is more difficult to do starting v5.505b and up.
- Contributed by Minarie 03:19, August 11, 2011 (UTC)
Fire Storm Starter []
- ... [Note 1] > ( Fire Storm ) X ? [Note 2] > Rekkuzan [Note 3] > Melee Attack X2 > [Note 4]
- Quick Input Version:
- ... > ( ↓ → ← C ) X? (2 or 3) > ↓←B > A > A > ↓ A > [Note 4]
- Total number of hits varies upon luck with Bonus CC Points but usually ranges about 23 to 40+ hits. Damage is usually about 1/6 to 1/7 of Kakashi Scarecrow's HP (500). This can be improved by using a Mystic arte at the end of the combo.
- Notes:
- Note 1: Try using a combo here that disables your enemy and gets you at mid-range from them. Hououtenku is highly advised but other artes prove useful too.
- Note 2: Usually, you use 2 or 3 Fire Storms consecutively here. With good luck, you may cast more than that depending on the bonus CC you obtain during mid-combo. The proper timing is to press the command as soon as you see the floor around the enemy turn red.
- Note 3: Use Rekkuuzan as soon as you see the floor around the enemy turn red after casting Fire Storm. This will allow you to hit the enemy while Fire Storm attacks thus enabling Stan to recover his CC while maintaining the combo counter at the same time. You can also use other artes with short delays (e.g. Bakuenken, Majinken, Kogahazan) as an alternative for Rekkuzan but be wary of your distance with the enemy.
- Note 4: Unleash your basic favorite combo here but make sure your 1st arte lets you close in on the enemy (e.g. Souryuu Rengazan, Majin Souhazan, Rekkuzan). Luck is a big factor here as the number of hits will increase depending on the bonus CC you receive as you attack. You can even finish this combo with a Blast Calibur or extend it further using Overlimit
- This combo takes advantage of Fire Storm's long animation and Rekkuzan's (and Stan’s other similar artes) short delay after execution then continues the combo normally.
- This combo is very effective against AI but has yet to be tested against real players.
- Contibuted by Minarie 15:34, March 15, 2011 (UTC)
Wall Pinch Counter []
- Kuuga Shouryuukyaku [Note 1] > Hiou Zetsuenshou [Note 2] > Satsugeki Bukouken [Note 3]
- Quick Input Version:
- ↓ ↓ E > ↓ → ← E or ↓ → ← F > ↓ ← → E
- Total Hits = 32. Damage is 50% of Kakashi Scarecrow's HP (500).
- Requirements:
- Stan must be cornered against a wall.
- 80% TP for all the artes used.
- Notes:
- Note 1: Use this arte when the enemy is at close range and while Stan is cornered against a wall.
- Note 2: Use Hiou Zetsuenshou just as the last kick from Kuuga Shouryuukyaku sends the enemy downward.
- Note 3: The timing to use Satsugeki Bukouken is just after the enemy can air-tech. Even if the enemy air-techs, he/she won't be able to block Satsugeki Bukouken.
- Requirements:
- This is a very effective combo to use against enemies who always try to use wall combos on you.
- Contributed by: Minarie 04:01, August 11, 2011 (UTC)
Senkoureppa Spammer Combo (v5.503 and below only)[]
- Jump [Note 1] > Aerial Attack C [Note 1] > ( Forward Jump > Aerial Attack A [Note 2] > Aerial Attack C [Note 2] ) X4 > Souryuu Rengazan > ( Senkoureppa ) X??? [Note 3] > [Note 4]
- Quick Input Version:
- ↑ > C > ( ↑ → > A > C ) X4 > ↓ ← → B > ( → ← → A ) X?? > Note 4
- Total Hits = 23 at least. Damage is 1/6 of Kakashi Scarecrow's HP (500).
- Requirements:
- Enemy must be downed or disabled before starting the combo.
- Notes:
- Note 1: The enemy must be disabled before jumping. Try to time your jump just right and make sure that when the enemy gets up, you can hit them with Stan's Aerial Attack C.
- Note 2: The timing of Aerial Attack A is to press it just as Stan starts to jump and its not very difficult. On the other hand, the timing of Aerial Attack C is to press it as late as possible but not too late as Stan would already be standing on the floor by then.
- Note 3: Keep spamming Senkoureppa until you run out of CC. This arte has a high chance of generating bonus CC, making the combo stronger. Also, the combo immediately disables the enemy after it so you could restart the combo again. AI enemies cannot escape this part of the combo using Overlimit.
- Note 4: You can use Overlimit to extend the combo even if your not near a wall. Just make sure to release it when the enemy is still in mid-air. You can also use a Blast Calibur to end this combo for maximum damage.
- Requirements:
- This is a practical application of Stan's 9-Hit Starter Combo 2 + Artes. Very easy to use and has high power. Use this combo as Stan's Bread and Butter.
- Update: This combo has been nerfed and does not work anymore starting v5.505b and up.
- Contributed by: Minarie 06:36, August 11, 2011 (UTC)
Wall Combo (v5.503 and below only)[]
- Jump [Note 1] > Aerial Attack C [Note 1] > ( Forward Jump > Aerial Attack A [Note 2] > Aerial Attack C [Note 2] ) X3 > ( Forward Jump > Aerial Attack C X2 [Note 3] ) X3 > Melee Attack A X2 > Kogahazan > ( Bakuenken ) X2 > ( Senkoureppa ) X?? [Note 4] > [Note 5]
- Quick Input Version:
- ↑ > C > ( ↑ → > A > C ) X3 > ( ↑ → > C > C ) X3 > A > A > ↓ A > ↓ → D > ↓ → D > ( → ← → A )X?? (1 or 2 usually) > [Note 5]
- Total Hits = 26 at least. Damage is 1/5 of Kakashi Scarecrow's HP (500).
- Requirements:
- Enemy must be downed or disabled before starting the combo.
- Enemy must be cornered against a wall.
- Notes:
- Note 1: The enemy must be disabled before jumping. Try to time your jump just right and make sure that when the enemy gets up, you can hit them with Stan's Aerial Attack C. Using Fire Wall or Maou Engekiha as a starter works really well with this combo due to their faster delay recovery as compared to Stan's other disabling artes.
- Note 2: The timing of Aerial Attack A is to press it just as Stan starts to jump and its not very difficult. On the other hand, the timing of Aerial Attack C is to press it as late as possible but not too late as Stan would already be standing on the floor by then.
- Note 3: The Aerial Attack C should be executed when Stan is at the half of his jump height. The second one should be connected as soon as possible by spamming the command button.
- Note 4: Keep spamming Senkoureppa until you run out of CC. This arte has a high chance of generating bonus CC, making the combo stronger. Also, the combo immediately disables the enemy after it so you could restart the combo again. AI enemies cannot escape this part of the combo using Overlimit.
- Note 5: You can use Overlimit to extend the combo further. You can also use a Blast Calibur to end this combo for maximum damage.
- Requirements:
- Stan's wall combo. Decent damage and easy to use. This is more powerful than Stan's Senkoureppa Spammer Combo.
- Update: This combo has been nerfed and may not work just like the original starting v5.505b and up.
- Contributed by: Minarie 07:45, August 11, 2011 (UTC)
Shouourekka Loop []
- ( Souryuu Rengazan [Note 1] > Senkuuretsuha [Note 2]> Shouourekka [Note 3] ) X As many as your TP allows you to [Note 4]
- Quick Input Version:
- ( ↓ ← → B > ↓ ← A > → ← → D ) X Until TP is 0
- Total maximum hits of this combo has yet to be determined due to my inability to go beyond the 6th Shouourekka. Minarie 06:34, August 12, 2011 (UTC)
- Damage of this combo is about 1/7 or 1/8 of Kakashi Scarecrow's HP (500) for every Shouourekka used with diminishing returns as the combo counter increases. On the 6th loop, the damage is about 60% of Kakashi's HP.
- Requirements:
- Notes:
- Note 1: Wait for your CC to recover before using this arte again. If this is your 1st time in using this arte, don't use it at point-blank range.
- Note 2: The timing here is very difficult to achieve. During Souryuu Rengazan, watch Stan's sword very carefully and use Senkuuretsuha depending on which loop you are:
- 1st & 2nd: After raising his sword from the 4th hit of Souryuu Rengazan but before Stan holds his sword back.
- 3rd: Simultaneous with Stan, hitting the enemy with his 4th slash.
- 4th - 6th: Unknown.
- Note 3: You will notice that once the enemy touches the ground after Senkuuretsuha, he/she will be slightly pushed away from Stan. Use Shouourekka on that part and try to delay the use as much as possible but not too much as it won't hit the enemy.
- Note 4: You can repeat this combo for as long as you have enough TP but this is not advised as this combo's timing changes for every loop. For a practical application of this combo, just use 2 loops (2nd Shouourekka) and finish it a Senkuuretsuha spam then a mystic arte.
- Stan's semi-infinite combo . Very difficult to use so it's advised to use the loop only once or twice.
- You can only use this combo while Stan has low HP or is in Overlimit.
- Changes in the enemy hitbox sizes can also affect the timing needed for this combo. It is easier to use this combo on enemies with large hitboxes.
- Don't worry if you make a mistake since Shouourekka will always disable the enemy, giving you the chance to use Stan's Senkuuretsuha Spammer Combo.
- Contributed by: Minarie 06:34, August 12, 2011 (UTC)

Instant Kill Combo (v5.503 and below only)[]
- Jump [Note 1] > Aerial Attack C [Note 1] > ( Forward Jump > Aerial Attack A [Note 2] > Aerial Attack C [Note 2] ) X3 > ( Forward Jump > Aerial Attack C X2 [Note 3] ) X3 > Melee Attack A X2 > Kogahazan > ( Bakuenken ) X Until CC is fully depleted > Overlimit Lv2 > ( Shishisenkou > Fire Wall ) X Until Overlimit is nearly empty > Shishisenkou > Zankuu Tenshouken
- Quick Input Version:
- ↑ > C > ( ↑ → > A > C ) X3 > ( ↑ → > C > C ) X3 > A > A > ↓ A > ( ↓ → D ) X Until CC = 1 or 0 > ↓ F > ( → ← → C > ↓ → ← B ) X Until OVL is about to expire > → ← → C > ← ↓ → E
- Total Hits is usually 80. Damage instantly kills Kakashi Scarecrow (HP 500).
- Requirements:
- Enemy must be downed or disabled before starting the combo.
Tales of ACS v5.503 Stan Aileron Instant Kill Combo (80 Hits)
Stan Aileron's instant kill combo at 80 hits.
- Enemy must be cornered against a wall.
- 85% TP for artes used.
- Overlimit Gauge set at Lv2.
- Enemy must be downed or disabled before starting the combo.
- Notes:
- Note 1: The enemy must be disabled before jumping. Try to time your jump just right and make sure that when the enemy gets up, you can hit them with Stan's Aerial Attack C.
- Note 2: The timing of Aerial Attack A is to press it just as Stan starts to jump and its not very difficult. On the other hand, the timing of Aerial Attack C is to press it as late as possible but not too late as Stan would already be standing on the floor by then.
- Note 3: The Aerial Attack C should be executed when Stan is at the half of his jump height. The second one should be connected as soon as possible by spamming the command button.
- Requirements:
- This is Stan's Wall Combo with an Overlimit extension. The Aerial C Attack juggle is the only tricky part of this combo.
- Update: This combo has been nerfed and may not work just like the original starting v5.505b and up.
- Contributed by: Minarie 08:54, August 11, 2011 (UTC)

Highest Combo[]
Story Mode[]
Stan has a total of 6 Story Modes, ranging from Easy to Chaos. Note that all modes including and preceding Hard feature opponents that come in "Rounds", meaning that the field, positions, and statistics (HP and otherwise) will reset once an opponent is defeated. Modes after Hard feature opponents that come one after another, meaning that the fields, positions, and statistics of your character will not reset once an opponent has been defeated. However, A portion of your HP is refunded whenever an opponent is defeated in Mania Mode.
Easy[]
Klarth F. Lester
Asbel Lhant
Chloe Valens
Shizel (with Lyris Aileron as Assistant)
Normal[]
Presea Combatir
Shing Meteoryte
Guy Cecil
Hugo Gilchrist
Hard[]
Lloyd Irving
Lyris Aileron
Lion Magnus
Barbatos Goetia (2 Rounds)
Barbatos Goetia X2 (Upon defeat Barbatos Goetia with a 2-0 record)
Mania[]
- Shizel
Dhaos (Upon defeat of Shizel)
Hugo Gilchrist (Upon defeat of Dhaos)
Barbatos Goetia (Upon defeat of Hugo Gilchrist)
- Shizel
Unknown[]
- Dhaos
Hugo Gilchrist (Upon defeat of Dhaos)
Kratos Aurion (Upon defeat of Hugo Gilchrist)
Barbatos Goetia (Upon defeat of Kratos Aurion)
Alexei Dinoia (Upon defeat of Barbatos Goetia)
- Dhaos
Chaos[]
- Nereid
Mithos Yggdrasill (After at least 45 seconds)
Barbatos Goetia (After at least 100 seconds)
Kratos Aurion (After at least 140 seconds)
Lion Magnus & Hugo Gilchrist (Upon defeat of Kratos Aurion)
Lyris Aileron (After Lion Magnus' HP get below 200)
- Nereid
Cut-Ins[]
In ACS, Stan, and his cameo support character Kyle Dunamis, has six cut-ins.
- Tales of the World: Radiant Mythology 2
- Tales of Destiny: Director's Cut
- Tales of VS.
- Tales of Destiny: Director's Cut
- Tales of Destiny: Director's Cut
- (Top) Tales of Destiny: Director's Cut, (Bottom) Tales of Destiny 2 (PSP)
")
")
")
")
")
")
As a cameo support characcter for Kyle Dunamis, Stan has one cut-in.
- (Top) Tales of Destiny 2 (PSP), (Bottom) Tales of Destiny: Director's Cut.
")